

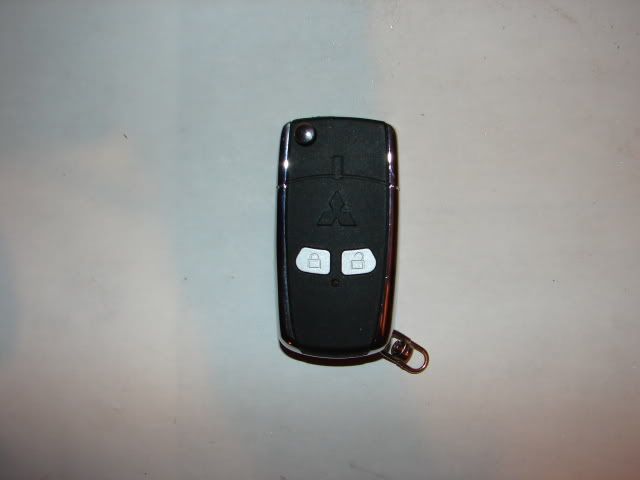
So I took a little break from the headlight stuff to work on this little number:
![Image]()
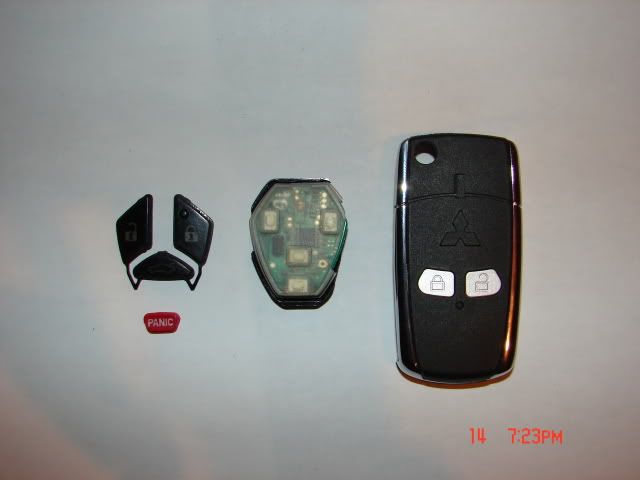
It's a Mitsubishi switchblade/flip key (or whatever you wanna call it) originally meant for the older generation Lancers (they don't make one specifically for our car). But with a bit of modification I got it to work for our car! The only thing is that I did have to give up the trunk and panic buttons though as the shell case only has two buttons; one for lock and one for unlock, but I thought it was worth the cool factor of this thing. Anyway I think I might be the first to have done this, so here are some pics of the process:
I started taking pics when I was already halfway done, so some things will have already been completed beforehand.
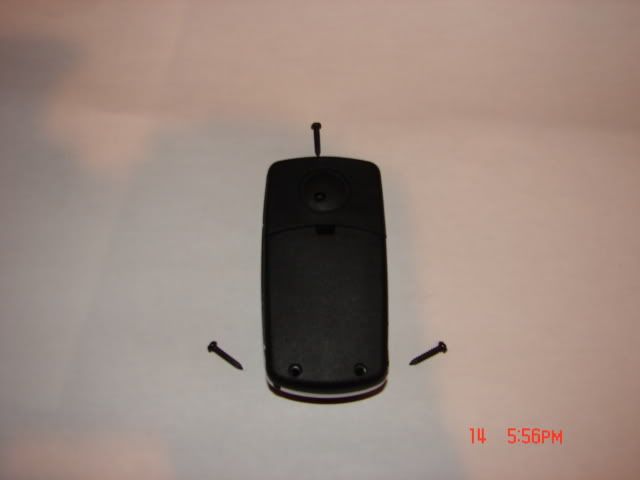
Nails removed from the back so that the shell case can be disassembled.
![Image]()
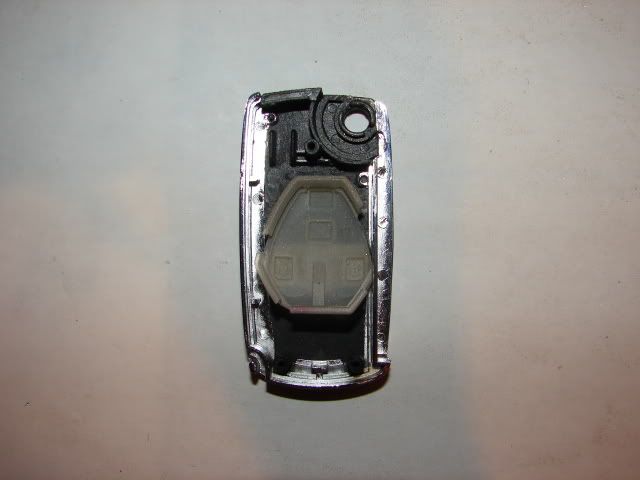
Shell case disassembled.
![Image]()
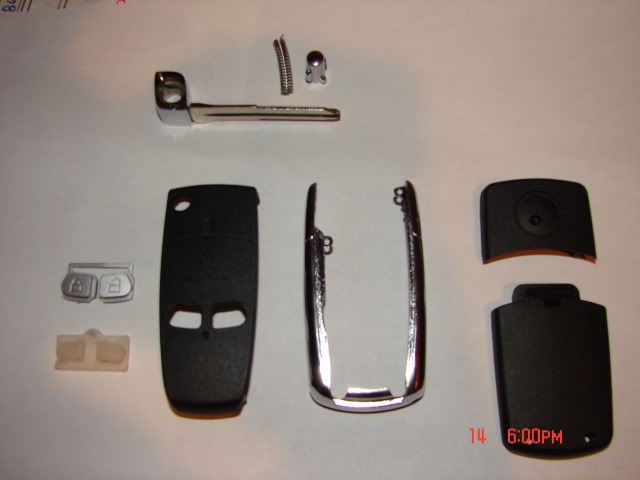
Backside of the front of the case. Had to shave off some inner plastic pieces that was meant to hold the Lancer key fob in place.
![Image]()
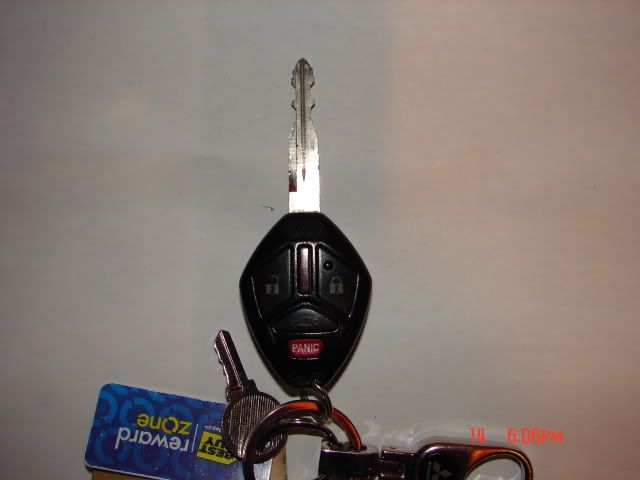
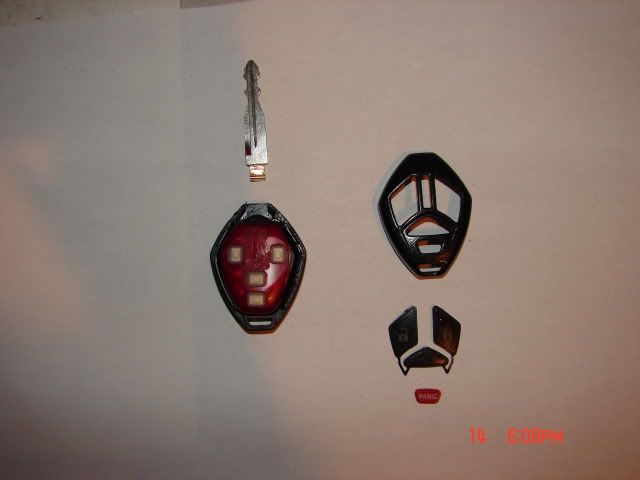
Spare key that i'm about to hack up.
![Image]()
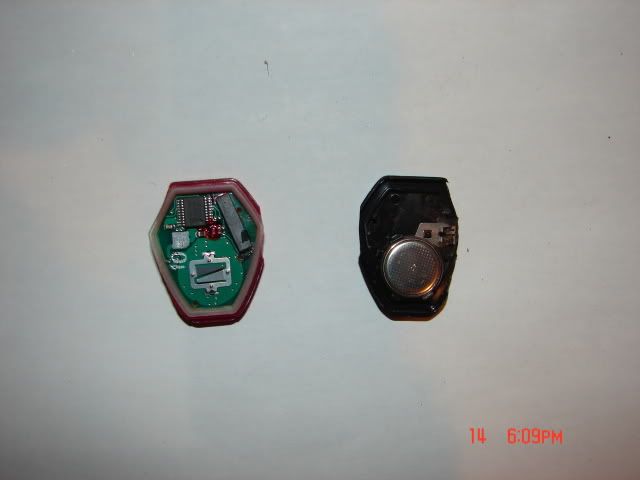
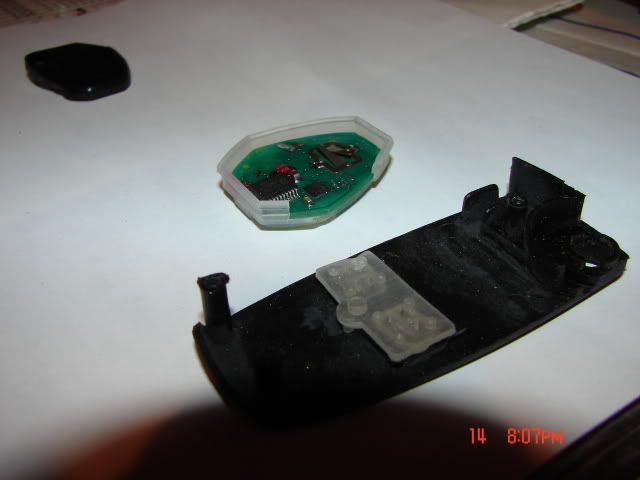
Key taken apart (keyblade had already been grinded down/trimmed for the flip key and part of the key fob had already been trimmed/shaved off...ended up discarding the red plastic piece altogether).
![Image]()
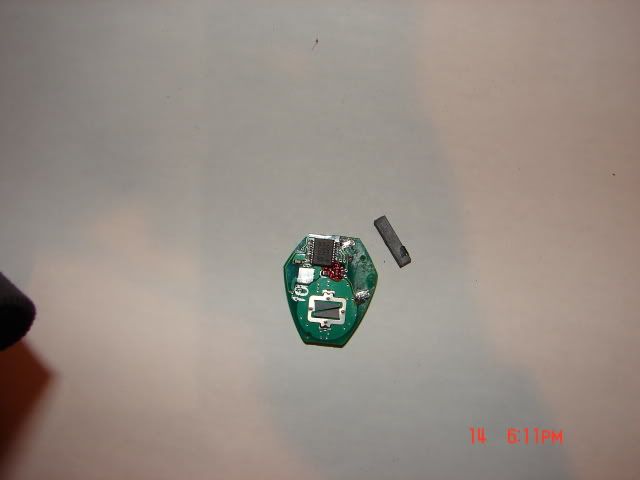
Key fob taken apart...here's the tricky part: the rectangular piece running diagonally on the top right is the transponder. This is needed to start your car. It has to be within a few centimeters of the ignition cylinder in order to communicate with and start your car. It is glued and soldered into place and has to be removed. There's a spot allocated for it at the very top of the shell case as you will see later. I stuck a piece of electrical tape on the bottom to indicate the negative side of the transponder.
![Image]()
![Image]()
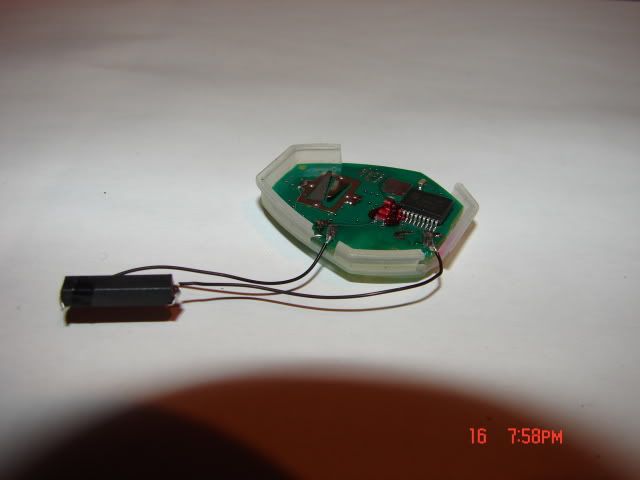
The transponder has to be connected to the circuit board, so I used some 30-gauge wire to connect the terminals of the circuit board to the corresponding terminals of the transponder.
![Image]()
![Image]()
Now if you'll notice, the flip key shell case has the lock and unlock buttons in reverse order in comparison to our keys (ignore the lack of a transponder).
![Image]()
This means that key fob will have to be placed upside down inside the shell case in order for the lock and unlock buttons to work correctly.
![Image]()
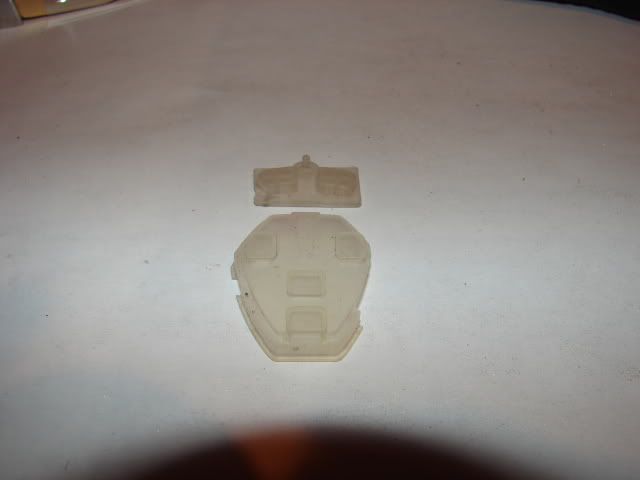
The two buttons (lock and unlock) on our key are spread a bit further apart than that of flip key, so I had to adjust the white rubber piece of the key fob in a way so that the flip key buttons would be able to hit them squarely.
![Image]()
![Image]()
![Image]()
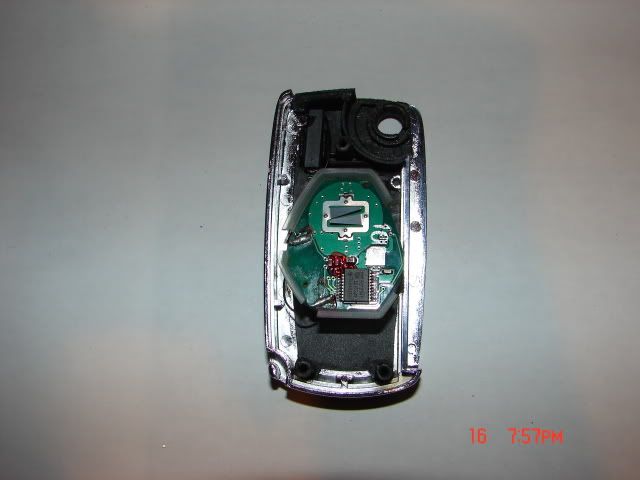
I then placed the circuit board back into place, and here you will see the little spot on the top left allocated for the transponder.
![Image]()
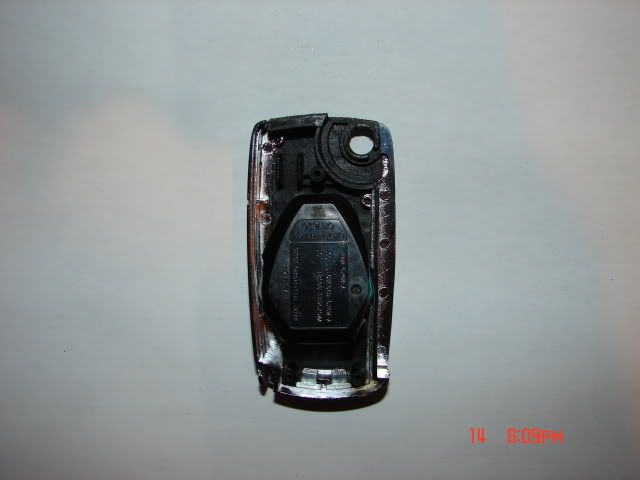
Put the back of the key fob back on (again, ignore the lack of a transponder).
![Image]()
It's a Mitsubishi switchblade/flip key (or whatever you wanna call it) originally meant for the older generation Lancers (they don't make one specifically for our car). But with a bit of modification I got it to work for our car! The only thing is that I did have to give up the trunk and panic buttons though as the shell case only has two buttons; one for lock and one for unlock, but I thought it was worth the cool factor of this thing. Anyway I think I might be the first to have done this, so here are some pics of the process:
I started taking pics when I was already halfway done, so some things will have already been completed beforehand.
Nails removed from the back so that the shell case can be disassembled.
Shell case disassembled.
Backside of the front of the case. Had to shave off some inner plastic pieces that was meant to hold the Lancer key fob in place.

Spare key that i'm about to hack up.
Key taken apart (keyblade had already been grinded down/trimmed for the flip key and part of the key fob had already been trimmed/shaved off...ended up discarding the red plastic piece altogether).
Key fob taken apart...here's the tricky part: the rectangular piece running diagonally on the top right is the transponder. This is needed to start your car. It has to be within a few centimeters of the ignition cylinder in order to communicate with and start your car. It is glued and soldered into place and has to be removed. There's a spot allocated for it at the very top of the shell case as you will see later. I stuck a piece of electrical tape on the bottom to indicate the negative side of the transponder.
The transponder has to be connected to the circuit board, so I used some 30-gauge wire to connect the terminals of the circuit board to the corresponding terminals of the transponder.

Now if you'll notice, the flip key shell case has the lock and unlock buttons in reverse order in comparison to our keys (ignore the lack of a transponder).
This means that key fob will have to be placed upside down inside the shell case in order for the lock and unlock buttons to work correctly.
The two buttons (lock and unlock) on our key are spread a bit further apart than that of flip key, so I had to adjust the white rubber piece of the key fob in a way so that the flip key buttons would be able to hit them squarely.
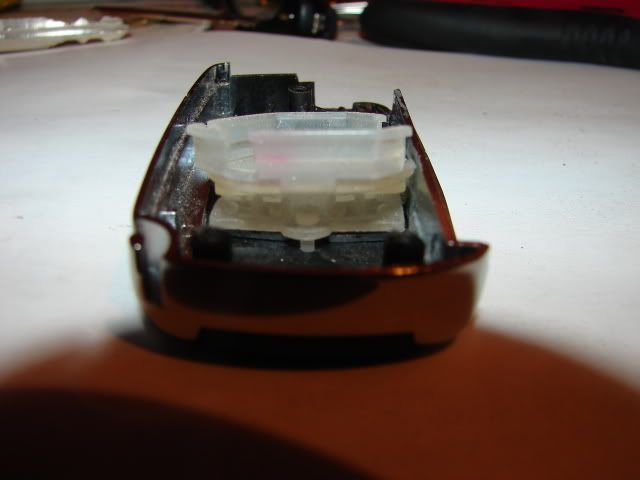
I then placed the circuit board back into place, and here you will see the little spot on the top left allocated for the transponder.
Put the back of the key fob back on (again, ignore the lack of a transponder).


 added a link instead.


